I began collecting baby signals in 2002, in January to be precise. I initially concentrated on getting one of each of the different primary embossings. I fairly quickly branched out and started trying to get one of each of the different Embossing Index Numbers (EINs) listed in the price guide. I have always been interested in the history of the insulators that I have, and concentrating on one particular shape led me to an entirely different level of historical investigation. Combine that with ever greater availability of historical information, as presented in the list of patents and newspaper and journal articles at reference.insulators.info, and I found that I could turn up a great deal of information related to baby signals. At some point, I began trying to put a date range on every single CD 160 EIN, and was surprised to find that this was actually an achievable task, within some limits. Between the histories of the various companies available in the numerous hobby books, first hand knowledge from contemporary newspaper articles, discussions with various experts, and articles in Crown Jewels, I began to acquire a library of information that made it possible to date many baby signals with a higher degree of precision than I had ever expected. Around 2007, I started documenting all this information, and have since accumulated some 200 pages of information related to baby signals.
The more I collected and the more I learned, the broader my interest became. In 2007, I started a downhill slide when I realized that the various colors had more significance than I had originally thought. I started collecting color variations. I also started to pay attention to mold variations, and started collecting by mold number around 2007 or 2008. In 2008, I slid even further when I realized that baby signals came in porcelain, too. I started being interested in tree insulators due to the use of the baby signal by the Holmes tree insulator, and got my first example of one of those in 2009. Each of these widenings of my interest were brought about by new information I had learned, and each led to other interesting discoveries.
Sometime in 2009 or 2010, I discovered Elton Gish's Insulator Research Service. I asked if he had any catalog drawings of CD 160s, and was absolutely amazed at the information that Elton had. Page after page of catalogs throughout the history of the baby signal were forthcoming. You could see what insulators were offered when, how they were referred to by the manufacturers, and pick up on more information that made dating the various insulators even more precise than I had had them before.
As I accumulated all this information, I knew that I wanted to do a display. I had done a couple displays before, at the local Genesee Valley Bottle Collectors Association Show and Sale in Rochester. This time, I wanted to do something for the insulator community. The Mid-Ohio show in Springfield was my choice of venue, both because it avoided the "competition" of an NIA show, and because it would also provide exposure to a good cross section of the insulator community. Sometime around 2008 or 2009, I decided to do a display and asked if I could get a display table. I couldn't -- they were "sold out". I'm actually rather happy that happened, because it gave me a few more years to gather more information, and make a much better display.
From that point, though, I wes seriously thinking about a display. I thought about what I wanted to show people, which insulators I wanted to include, how I wanted to show them. I made up drawings of possible layouts. I tried to figure out how to present the historical aspect. I kept changing my mind about everything. It took a while, but my vision finally got to a point that I thought I had enough to do a decent display. In July of 2012, at the National in Kansas City, I stopped by Steve Blair's table and signed up for a display space at the Mid-Ohio show. I was committed -- and I had something like 3 months to put it all together.
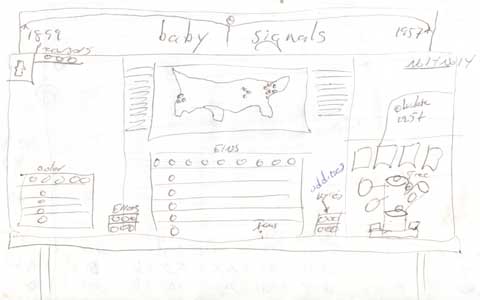
A tentative drawing
The first thing I had to realize was how much space I had to play with. The display tables were 8' long, by 2 1/2' deep. OK, just how many insulators did I have to display in that space? I kept toying with the idea of having 160 insulators, to match the CD. I have always liked Al and Ginny Way's display of 162 CD 162s, and the idea appealed to me. Looking at how many different EIN variations I had, and how many different porcelain versions there were, I was actually fairly close to that number, so I started to lay everything out with that in mind.
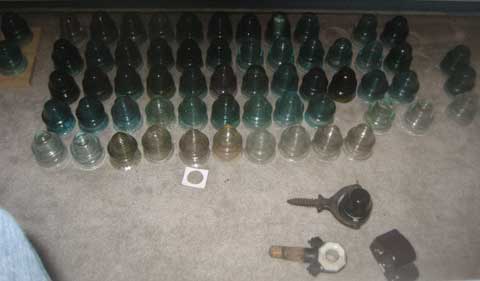
An early layout
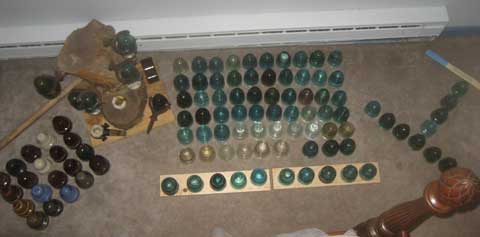
I discovered that I really didn't have enough room, at least not the way I had things envisioned. I wanted to display the precursors to the baby signal shape, the different EINs through time, the porcelain equivalents, the tree insulators, and a number of related pieces. I had some oddities with extended inner skirts, harelips and the like. I realized I need to include some color variations. I laid them all out on the floor and shuffled them around, and rather quickly realized I couldn't do it all. The related pieces had to be done without, the historical precursors were reluctantly let go. At the National Show in Kansas City, I had also helped judge the displays. This was very educational, and gave me a lot to think about in regards to my own display.
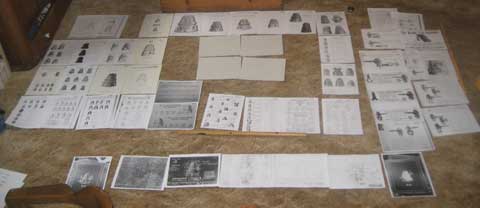
Early backdrop layout
I finally managed to get a layout that made some sense to me, and had to start constructing the actual shelving.
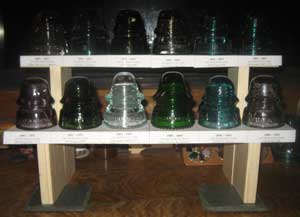
First Shelf Experiment
I didn't have any display cases to use, and wasn't going to pay the amount of money it would have required for light cases. I decided to build the shelves myself, which led to more design choices and thoughts. A big one, that I didn't realize at first, was that I had to transport everything some 500 miles to Springfield. My car is a Toyota Matrix, and not only is it not the largest car out there, but it also needed to transport myself, my wife, 2 children, and all our stuff for the weekend, in addition to the insulators and the display itself. I had to construct everything in such a way that it would all break down for transportation. In addition to the shelving, I wanted a backdrop to display the plethora of catalog pages and advertisements that showed the baby signals.
The final layout
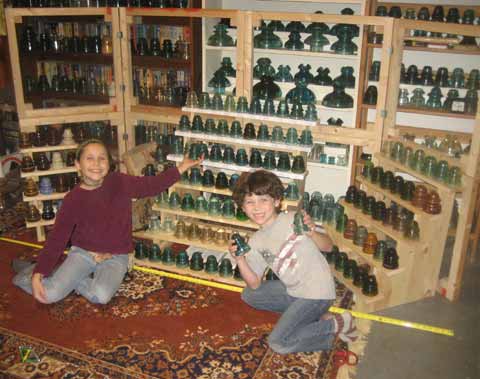
The size constraints made a choice of material for that a tough process, but after umpteen visits to various craft shops, I eventually found something that worked. I made the supports for the backdrop, and made them so they could be taken apart for transportation. Same with the shelves -- it all came apart into pieces small enough to move around. My children were a great help, too -- from arranging the insulators, moving things around, helping cut up all the wood, and putting it all together. I couldn't have done it all without them!
Did I mention the handout? That 200 page document of all my baby signal information had to get edited down to something short enough for a handout, and yet detailed enough to show the history behind everything. I won't get into just how long that took. I'm sure it could have been better, but I got it down to a reasonable size eventually.
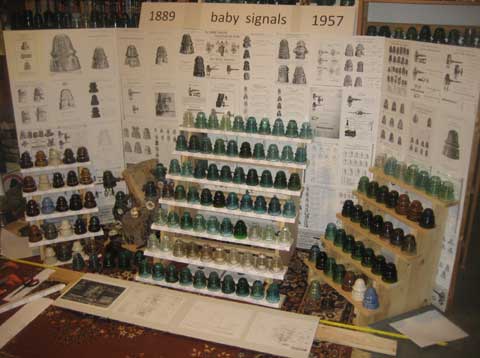
As the show date approached, I had more and more to do in less and less time. I had to print out all the catalog pages and advertisements. I had to figure out how to order them, how to attach them to the backdrop. I had to print out all the labels for all the insulators. I had to print them all out again and again as I discovered typos and errors and changed my mind about what went were. Finally, the week before the show, I finally had it all (mostly) assembled in the basement, ready to go. Some things I'd had to give up on, as I didn't have enough time, or I couldn't get it to come out right. Some things weren't quite right, but were good enough. I said enough was enough, and stepped back and celebrated that this was it!
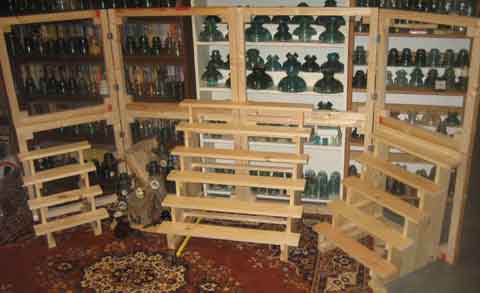
The "skeleton" of the display
Setup without the backdrop
Test setup at home
Then I started taking it all apart. The insulators went in boxes, in the correct order to be put back up later. The backdrops were taken off the supports, and folded up. The shelves were taken apart. The backdrop was disassembled. All the nuts and bolts were put in bags into a toolbox, along with hammers and wrenches and pliers, tape, string, and anything else I could think that I might need. It was all piled by the door -- and I realized just how big a pile it really was. I feared it wasn't going to fit in the car, even though we had a car top carrier to use. But with some inventive packing, it did fit. I didn't have room to bring any sales stock, but everything I needed appeared to fit. When we left on the trip to Springfield, my only problem was that I kept wondering what I had forgotten, what vital piece of the display I was leaving behind.
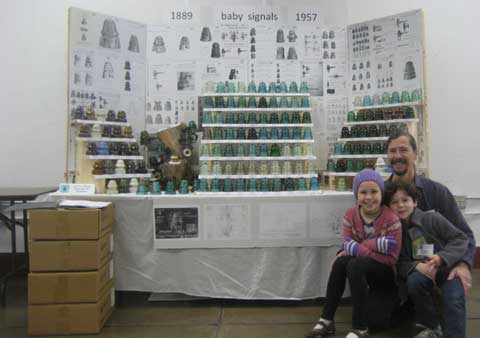
Luckily, when we got to the show on Friday and setup, it turned out that nothing was missing. It took almost 2 1/2 hours to put it all back together, even with help from Ian and Kyrie. But it was all there, and when it was assembled, we all stood back and admired our handiwork. It was a satisfying feeling, to say the least.
I got a lot nice feedback from folks saying that they enjoyed the display. It was great to get the "Most Educational" award. But I think the best part of it was all the help I got from Ian and Kyrie. I hope the memories they got from the experience are as good as mine!
Of course, on Sunday it all had to come down. It took another couple of hours to tear it apart and pack it all back up again. And even longer once we got home to unpack and put everything away again. Doing this display took an amazing amount of work and effort. It makes me appreciate all the other folks who put up displays even more than I did before. And I'm not sure I'm ready to do another one any time soon. But it was all worth it!