Snag-A-Lator Ver. 1.1
At the Robertsville swap meet, I had an opportunity to really put the Snag-A-Lator through its paces. While I was happy with its performance (and the glass we plucked with it), there was definitely room for improvement.
One of the first things I noticed was that the rope I was using (sash cord) was just a little too "stretchy." It was sprinkling off and on while we were "harvesting" and the insulators were slightly wet - just enough to be slightly slippery. I found it difficult to get a good grip on the insulators, and it was hard to tell when the loop was tight due to the elasticity of the rope. So I resorted to just pushing the insulators off the pins, and letting them fall. Fortunately, we were in a location where the ground was covered with grass and weeds, so the insulators suffered no ill effects from the fall.
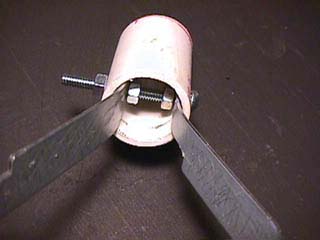
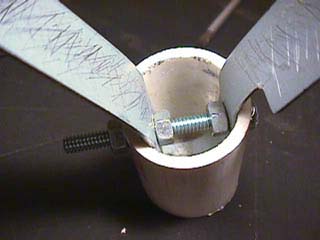
After a while, the V-shaped "wrench" loosened a little, and the rubber strips began to come off, as well.
After we got home, I made several improvements. First, I secured the wrench attachment more securely. I roughened up the metal strip to give the glue more surface to "grip." I then turned my attention to the rubber "grabber" part. First, I got rid of the sash cord, and used a length of hemp rope. It's got all those scratchy fibers, but unlike the sash cord, there is no stretch to this stuff at all.
Next, I secured one end of the rubber strap to the inside of the "tee" fitting as shown in the photos below. It is attached at an angle, because once you give the strap a half-turn, and feed it through the bottom of the tee, it gives you a nice horizontal loop. The loose end of the strap is fed through a hole in the PVC pipe, so the rope can be attached.
I decided to attach a clip to the end of the rubber strap. This allows me to carry the Snag-A-Lator without the rope tangling in everything - including my feet! When ready for use, the rope (tied to a ring) is simply attached to the clip, and its ready to snag glass. When not in use, the coil of rope can be carried in a pocket. I used my rotary tool to smooth the hole the strap feeds through. The action of pulling the loop closed is smooth as silk, now!
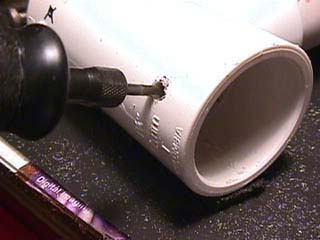
I also slightly bored out the holes that the eyebolts go through, so it's easier to assemble the sections in the field.
|
The metal strip that forms the "wrench" has been fastened in more securely. |
|
|
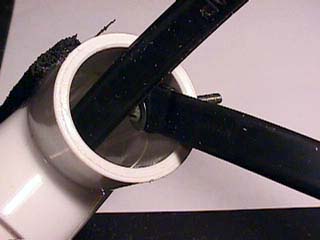
Here's a better view of how the "V" is fastened. I roughed up the surface of the metal to give the glue a better grip. Rubber strips were later glued on the metal strip. |
|
|
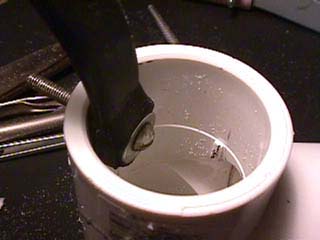
The next step was to improve the loop that grabs the insulators. I drilled a hole in the "tee" to fasten one end of the loop. |
|
|
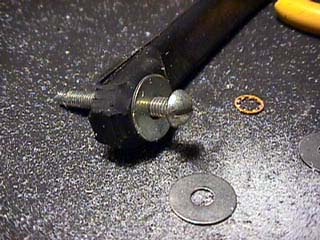
A screw goes through one end of the rubber strap. |
|
|
The strap is attached like this…. |
|
|
…..another view of the strap attachment. |
|
|
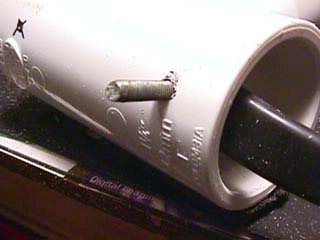
The other end of the strap is fed down the inside of the tee fitting, into the main part of the Snag-A-Lator. |
|
|
The end of the strap comes out through a hole, ready for the rope to attach to it. |
|
|
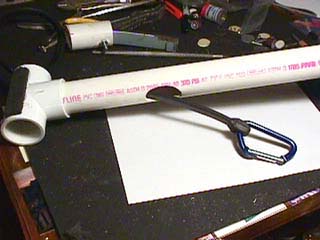
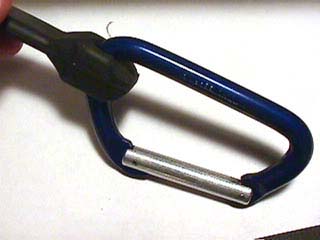
A spring-loaded clip is attached to this end of the strap so the rope can be carried separately, and attached quickly when needed. |
|
|
I am now using a hemp rope, which has no "stretch" to it. This gives a better "feel" when tightening the strap on an insulator, as well as allowing a tighter grip on the insulator. The rope is attached to a ring that can be coupled to the clip quickly. |

|
The Grabber Page